- Key Takeaways
- Start With Montauk’s Coastal Conditions
- Decide What the Bathroom Needs to Do
- Check the Layout Before Choosing Finishes
- Cosmetic Refresh or Full Redesign?
- Build a Moisture-Control Plan
- Choose Materials That Suit a Beachside Home
- Plan for Storage, Cleaning, and Seasonal Use
- Seasonal Home Checklist
- Confirm Permits and Project Requirements
- Create a Practical 2026 Project Timeline
- Final Decision Checklist
Key Takeaways
- Design the bathroom around Montauk’s coastal conditions, moisture, sand, seasonal occupancy, and everyday household routines.
- Prioritize practical systems and materials, including ventilation, waterproofing, durable finishes, useful storage, and easy maintenance.
- Confirm the layout, permits, project scope, materials, and timeline before construction to keep the renovation organized and suited to the home’s long-term needs.
A Montauk bathroom has to do more than look good in listing photos or feel relaxing after a day at the beach. It needs to manage damp towels, tracked-in sand, changing household routines, and the moisture that comes with a coastal climate. A thoughtful update starts with the room’s everyday job, then matches the layout, finishes, and systems to that reality.
For homeowners comparing local approaches, working with a bathroom remodeler Montauk, NY through Rea Pro Construction is a useful bathroom renovation resource. The company focuses on custom bathroom projects, including planning, finishes, fixtures, and redesigns, and serves Montauk, East Hampton, Southampton, and surrounding Hamptons communities. That local service focus makes it a relevant reference when considering how a bathroom update should work in an East End home.
Start With Montauk’s Coastal Conditions
Bathrooms already produce moisture, so they deserve extra attention in a home exposed to humid air, wind-driven rain, sand, and long periods of closed-up seasonal occupancy. Attractive tile and a fresh coat of paint cannot compensate for a weak ventilation plan or hidden water damage.
Before selecting finishes, look for practical warning signs: peeling paint near the ceiling, persistent musty odors, darkened grout, loose caulk, swollen vanity doors, or stains below a bathroom. These issues do not always identify the source of a problem, but they are good reasons to inspect the fan, plumbing connections, shower enclosure, and surrounding surfaces before cosmetic work begins.
Decide What the Bathroom Needs to Do
A successful design begins with a simple question: who uses this room, and how? The answer helps determine where money should go.
- Primary bathrooms often benefit most from layered lighting, generous drawer storage, comfortable circulation, and surfaces that are easy to maintain every day.
- Guest bathrooms should be intuitive to use, with durable fixtures, clear towel storage, dependable ventilation, and enough counter space for short stays.
- Seasonal-home bathrooms need accessible shutoff valves, low-maintenance materials, and a clear plan for checking the room before and after vacancy.
- Beach-access bathrooms can be designed around wet feet and towels, using wall hooks, open cubbies, a sturdy floor, and storage for sunscreen or beach essentials.
Check the Layout Before Choosing Finishes
Measure the existing room before falling in love with a vanity or shower system. Record wall lengths, ceiling height, window locations, door swings, vent locations, and visible plumbing. Photographs taken before demolition can also be useful when confirming where pipes, wiring, and framing were located.
Cosmetic Refresh or Full Redesign?
Keeping the toilet, sink, and shower in their present locations can simplify a project because it may reduce plumbing changes. However, moving fixtures may be worthwhile when the current room creates cramped movement, poor storage, or an awkward shower entrance. Test clearances with painter’s tape on the floor and open the door fully in the proposed layout. A room that works on paper should also feel comfortable in motion.
Build a Moisture-Control Plan
Ventilation and waterproofing should be treated as core parts of the remodel, not optional upgrades. Use a properly sized bathroom fan that exhausts outdoors, rather than into an attic or another interior area. A timer or humidity-sensing control can help the fan continue running after a shower, especially in a guest room where habits vary.
Ask detailed questions about the waterproofing system behind shower walls and beneath shower floors. Corners, seams, curb transitions, niches, and plumbing penetrations all need careful treatment. The EPA’s guidance on improving indoor air quality also identifies moisture control and outdoor-vented exhaust as important ways to reduce indoor moisture concerns.
Choose Materials That Suit a Beachside Home
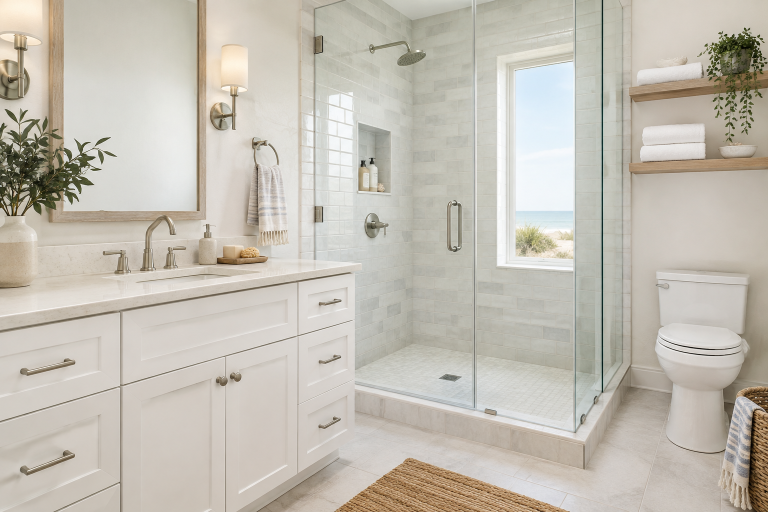
A coastal bathroom does not need nautical décor to feel connected to Montauk. Calm colors, natural textures, and well-chosen lighting can create an easygoing atmosphere while practical materials handle real use.
- Flooring: Consider slip-resistant porcelain tile or another durable surface appropriate for wet feet.
- Shower walls: Use tile or moisture-resistant wall panels installed over a complete waterproofing system.
- Cabinetry: Favor sealed, cleanable surfaces and drawers that keep toiletries organized.
- Countertops: Nonporous materials can be practical for cosmetics, sunscreen, and routine cleaning.
- Hardware: Choose finishes based on appearance, maintenance needs, and how easily water spots or fingerprints show.
A dark polished floor may look dramatic in a showroom, but it can make sand, water spots, and smudges more visible in a busy beach house. Order samples, view them in the bathroom’s actual light, and consider how the surface will look between cleanings.
Plan for Storage, Cleaning, and Seasonal Use
Storage is often what makes a renovated bathroom feel finished. Recessed medicine cabinets, deep vanity drawers, tall linen storage, and sturdy wall hooks can reduce counter clutter without enlarging the room. Open shelving works best for items that stay dry and can be wiped down easily.
Seasonal Home Checklist
- Make water shutoff valves easy to reach and label them clearly.
- Consider leak sensors near toilets, sinks, and other water connections.
- Select finishes that do not depend on frequent sealing or specialized care.
- Leave simple instructions for ventilation, cleaning, and winter preparation.
- Arrange for periodic checks when the property will be vacant for an extended period.
Confirm Permits and Project Requirements
Permit needs depend on the work involved. Plumbing, electrical, structural, and layout changes may require review and inspections, so confirm the requirements before demolition. The Town of East Hampton Building Department provides current application information and directs applicants to its digital permitting process.
Keep the project organized by asking who will prepare drawings, coordinate inspections, and document changes. A written scope should identify the work, allowances, payment terms, products, and responsibilities. Keep approved plans, product specifications, inspection records, and final invoices in one place.
Create a Practical 2026 Project Timeline
- Weeks 1 and 2: Define goals, measure the room, photograph existing conditions, and set a working budget.
- Weeks 2 through 4: Compare layout options, select key materials, and confirm permit questions.
- Weeks 4 through 6: Finalize the scope, order products, and confirm the construction schedule.
- During construction: Protect nearby rooms, address hidden conditions promptly, and approve changes in writing.
- Final review: Test fixtures, drains, fans, lights, outlets, doors, and shutoff valves before the project closes.
Seasonal demand, product availability, inspections, and weather can affect timing in Montauk. Making selections early gives the project more flexibility before the busiest summer period.
Final Decision Checklist
- Is the bathroom’s main purpose clear?
- Will the exhaust fan vent outdoors?
- Are shower and floor areas properly waterproofed?
- Can the finishes handle moisture, sand, and regular cleaning?
- Does the layout allow safe movement and useful storage?
- Have local permit needs been confirmed?
- Are the scope, schedule, allowances, and payment terms in writing?
A smart Montauk bathroom update is not simply a tile-and-vanity project. It is a plan for coastal conditions, seasonal routines, guests, and long-term upkeep. When the room is designed around those realities, it can feel comfortable now and remain dependable through busy summers, storms, and quiet off-seasons.