- Key Takeaways
- Why Humidity Testing Deserves More Attention
- How Moisture Affects Different Product Types
- Relative Humidity, Temperature, and Dew Point
- How to Build a Practical Humidity Test Plan
- Choosing Conditions, Samples, and Test Methods
- Select Conditions That Answer a Real Question
- Prepare Samples for Reliable Results
- Use Methods That Match the Suspected Failure
- Tracking Failures and Measurement Accuracy
- Turning Results Into Design Improvements
- Final Checklist for a Strong Humidity Test
- Conclusion
Key Takeaways
- Humidity can cause corrosion, swelling, electrical leakage, coating damage, and loss of adhesion.
- Useful tests begin with real storage, shipping, and operating conditions.
- Temperature, relative humidity, dew point, exposure time, and condensation all affect results.
- Reliable data depends on prepared samples, verified sensors, and measurable acceptance criteria.
- Testing is most valuable when findings lead to focused design and process improvements.
Why Humidity Testing Deserves More Attention
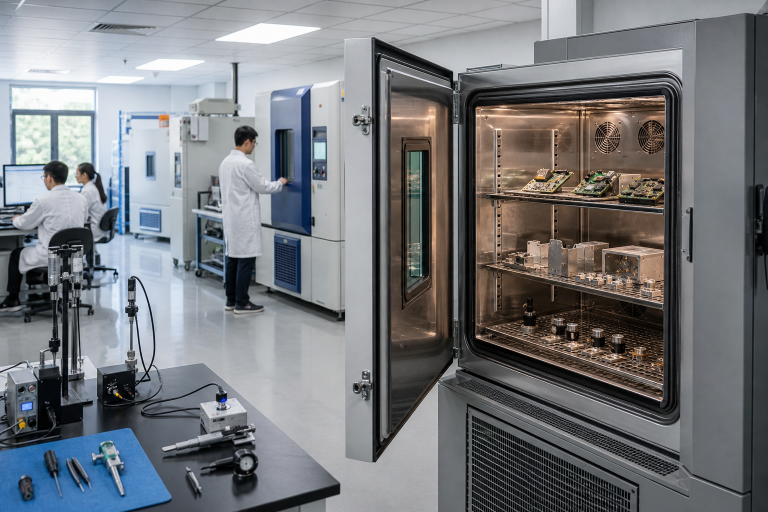
Humidity-related failures are often slow, hidden, and expensive to diagnose after a product reaches the field. A controlled temperature humidity chamber helps teams expose products to moisture conditions that may be difficult to reproduce consistently in a normal laboratory or production area. A part can look and function normally after a dry-room inspection, yet fail after prolonged damp storage, tropical shipping, or repeated temperature changes. For example, an electronic connector may initially pass continuity testing, then develop corrosion at contact surfaces after moisture enters a poorly protected interface.
How Moisture Affects Different Product Types
Moisture does not affect every product in the same way. The test plan should reflect the materials, assemblies, and functions most likely to be exposed.
- Electronics: Moisture can create leakage paths, alter insulation resistance, corrode contacts, and damage connectors.
- Metals: High humidity can accelerate oxidation, rust, galvanic corrosion, and coating breakdown.
- Plastics and rubber: Some materials absorb water, swell, soften, become brittle, or change dimensions.
- Adhesives and sealants: Moisture may reduce bond strength, cause blistering, or allow seals to crack and shift.
- Packaging: Moisture barriers, labels, cartons, and internal protection can all affect shelf life and product condition.
- Energy products: Cells, modules, sensors, and power electronics may have performance or safety risks when moisture reaches sensitive areas.
Relative Humidity, Temperature, and Dew Point
Relative humidity describes how much water vapor is in the air compared with the amount that air can hold at a given temperature. Because warm air can hold more moisture than cool air, a relative humidity value alone does not fully describe the moisture risk. The measurement science behind humidity calibration is important because dependable readings support traceable, repeatable testing. Dew point is the temperature at which water vapor begins to condense into liquid water. Condensation is often much harsher than humid air alone. A product moved from a warm, damp environment into a cooler space may cross the dew point, allowing water to form on surfaces, inside connectors, or beneath housings.
How to Build a Practical Humidity Test Plan
- Define the real environment. Consider geographic location, seasons, warehouses, shipping containers, operating spaces, and downtime.
- Identify failure modes. Ask what could corrode, swell, lose adhesion, short circuit, fog, crack, or leak.
- Choose the goal—separate early design screening from qualification, production verification, and long-term reliability work.
- Select test variables. Specify temperature, humidity, exposure duration, cycling pattern, and whether the product is powered.
- Set inspections and acceptance rules. Define what will be checked, when it will be checked, and what constitutes a pass, warning, or failure.
Choosing Conditions, Samples, and Test Methods
Select Conditions That Answer a Real Question
Steady exposure helps determine whether a product remains stable in a consistently damp environment. Humidity cycling reveals weaknesses caused by repeated expansion, contraction, moisture absorption, and drying. Condensing tests are appropriate when real use includes cold starts, outdoor exposure, or rapid environmental changes. A short, severe test can expose one type of weakness, while a longer, moderate test may reveal another. Avoid choosing extreme settings solely to obtain results faster. Instead, document why every setpoint and exposure time relates to a credible service risk.
Prepare Samples for Reliable Results
Record each sample’s material, lot, finish, assembly method, age, and storage history. Inspect and photograph samples before exposure, use realistic fasteners and coatings, and leave adequate space for airflow. Label every item clearly, avoid touching sensitive surfaces with bare hands, and include control samples when possible.
Use Methods That Match the Suspected Failure
- Steady-state exposure: Checks stability during sustained humidity.
- Humidity cycling: Looks for cracks, loose components, seal movement, and performance drift.
- Temperature-humidity testing: Evaluates whether heat increases moisture-related degradation.
- Powered testing: Determines whether the product operates safely and consistently while exposed.
- Post-test inspection: Identifies visual, electrical, mechanical, or chemical changes that remain after exposure.
Tracking Failures and Measurement Accuracy
Inspect samples during testing, not only at the end. Record discoloration, rust, fogging, blistering, swelling, cracking, seal displacement, abnormal resistance, reduced insulation, output changes, and response-time shifts. Photographs and brief inspection notes tied to the exact chamber conditions make later analysis far easier. Sensor accuracy is equally important. Confirm that probes suit the required temperature and humidity range, review calibration records, and position sensors where they represent the samples’ actual surroundings. Work involving humidity sensors operating in changing environments also illustrates why response speed, drift, and moisture recovery can matter as much as a displayed setpoint. Record measured values rather than relying only on controller settings. Blocked airflow, water droplets on a probe, damaged sensors, alarms, power interruptions, and chamber door openings can all affect the validity of the test.
Turning Results Into Design Improvements
Group failures by location, material, timing, severity, and production lot. Compare failed items with controls, then connect each pattern to a likely mechanism. If corrosion appears near a fastener, for example, the team might improve the barrier between dissimilar metals, repeat the exposure, and verify whether the failure disappears or moves elsewhere. Change one major design variable at a time whenever practical. After retesting, update drawings, material specifications, work instructions, inspection plans, packaging requirements, or supplier controls. A humidity test becomes far more valuable when it produces an actionable change instead of a simple pass-fail record.
Final Checklist for a Strong Humidity Test
- Document real service, storage, and shipping conditions.
- Identify the most likely moisture-related failure modes.
- Justify temperature, humidity, cycling, and duration.
- Inspect, photograph, and label samples before testing.
- Verify sensor calibration, placement, and measured conditions.
- Schedule interim inspections and define measurable pass-fail criteria.
- Document interruptions, anomalies, and sample-specific observations.
- Use the results to guide controlled design or process changes.
Humidity testing works best when it reflects actual product risks and produces data that teams can use. By combining realistic conditions, careful sample preparation, accurate measurements, and clear acceptance criteria, organizations can identify weak points earlier and build greater confidence in long-term product reliability.
Conclusion
Humidity testing is most useful when it goes beyond simply exposing a product to moisture and recording whether it passes or fails. The strongest test programs connect realistic storage, shipping, and operating conditions with specific failure risks, accurate measurements, and clear acceptance criteria. Temperature, relative humidity, dew point, condensation, exposure time, and cycling can all influence how materials and assemblies respond. Careful sample preparation and verified sensors also help ensure that results reflect actual product behavior rather than testing inconsistencies. Most importantly, test findings should lead to practical improvements in materials, coatings, seals, packaging, assembly methods, or production controls. By treating humidity testing as a tool for learning and improvement, teams can identify vulnerabilities earlier, reduce costly field failures, and build greater confidence in product reliability.